Instagram Threads API - Part 1 - Obtaining Your API Access Token
In today’s digital era, leveraging the power of social media is essential for businesses and individuals alike. Among the myriad of platforms available, Instagram Threads stands out for connecting with your audience, amplifying your brand’s message, and fostering engagement. But did you know that you can take your Instagram Threads experience to greater heights by tapping into its API (Application Programming Interface)?
This blog series aims to unlock the potential of your Instagram Threads account through API integration, beginning with the crucial step of obtaining your API access token, specifically tailored for post creation. By understanding and utilizing the Instagram Threads API, you can streamline your content management, enhance your engagement strategies, and gain valuable insights into your audience’s preferences and behaviors.
Part 2 is out now.
Prerequisites
Before diving into obtaining your API access token, ensure you have the following:
- Facebook Developer Account: You’ll need an active Facebook account to access the Facebook for Developers platform and create a developer account.
- Instagram Threads Account: Ensure you have an Instagram Threads account for your business or organization, as you’ll be obtaining the API access token specifically for managing posts on this account.
- Technical Knowledge: Basic understanding of web development concepts such as APIs, authentication, and HTTP requests will be beneficial.
- Patience: The process of setting up your Facebook Developer account, creating an app, and obtaining an API access token may require some time and patience.
Understanding the API Access Token for Post Creation
Before we delve into the process of obtaining your API access token, let’s clarify its role in post creation. An API access token serves as a unique identifier granting permission to interact with the Instagram Threads API. In this context, it allows you to automate the process of posting content to your Instagram Threads account.
Obtaining Your API Access Token for Post Creation
Now, let’s walk through the steps to obtain your API access token specifically for post creation:
Create a Facebook Developer Account
If you haven’t already, sign up for a Facebook Developer account on the Facebook for Developers website.
Set Up a New App
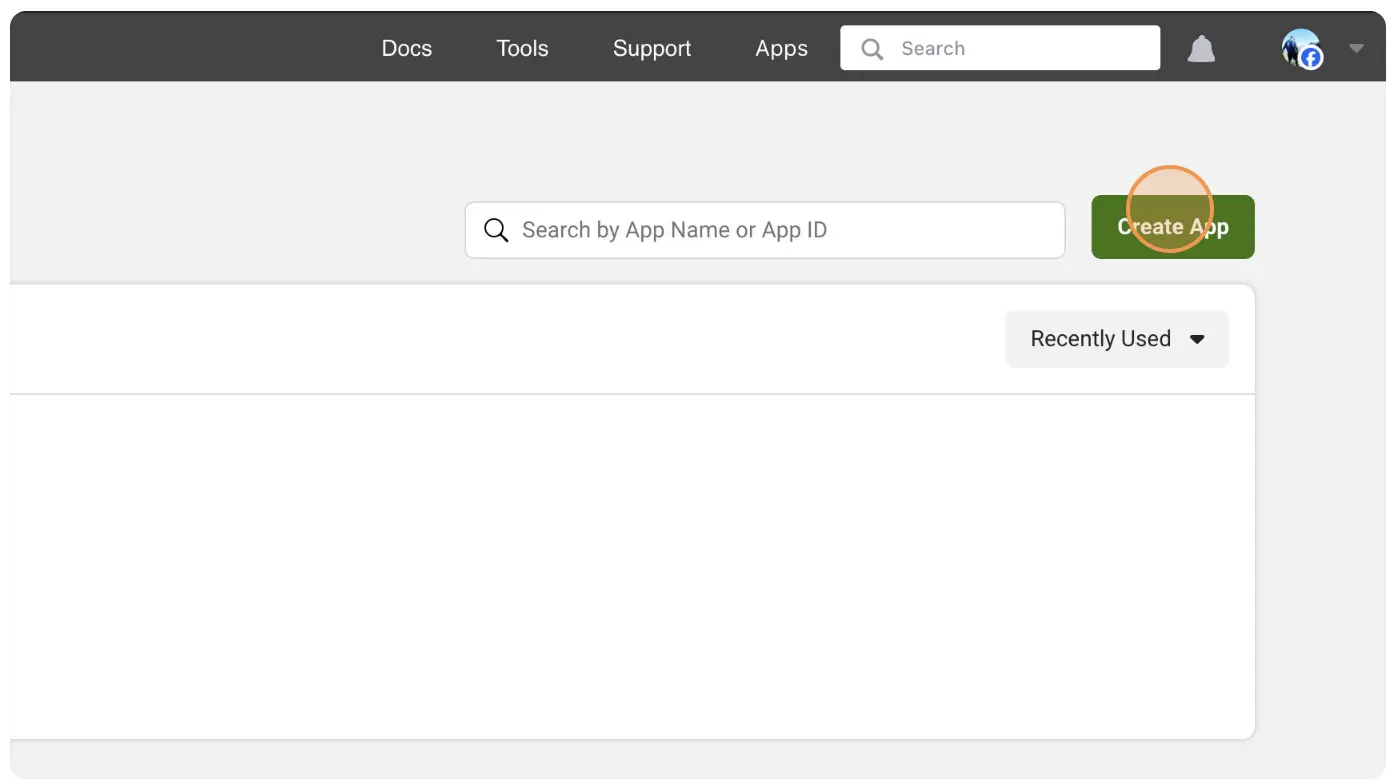
- Navigate to the “My Apps” dashboard within your developer account.

- Click “Create App”
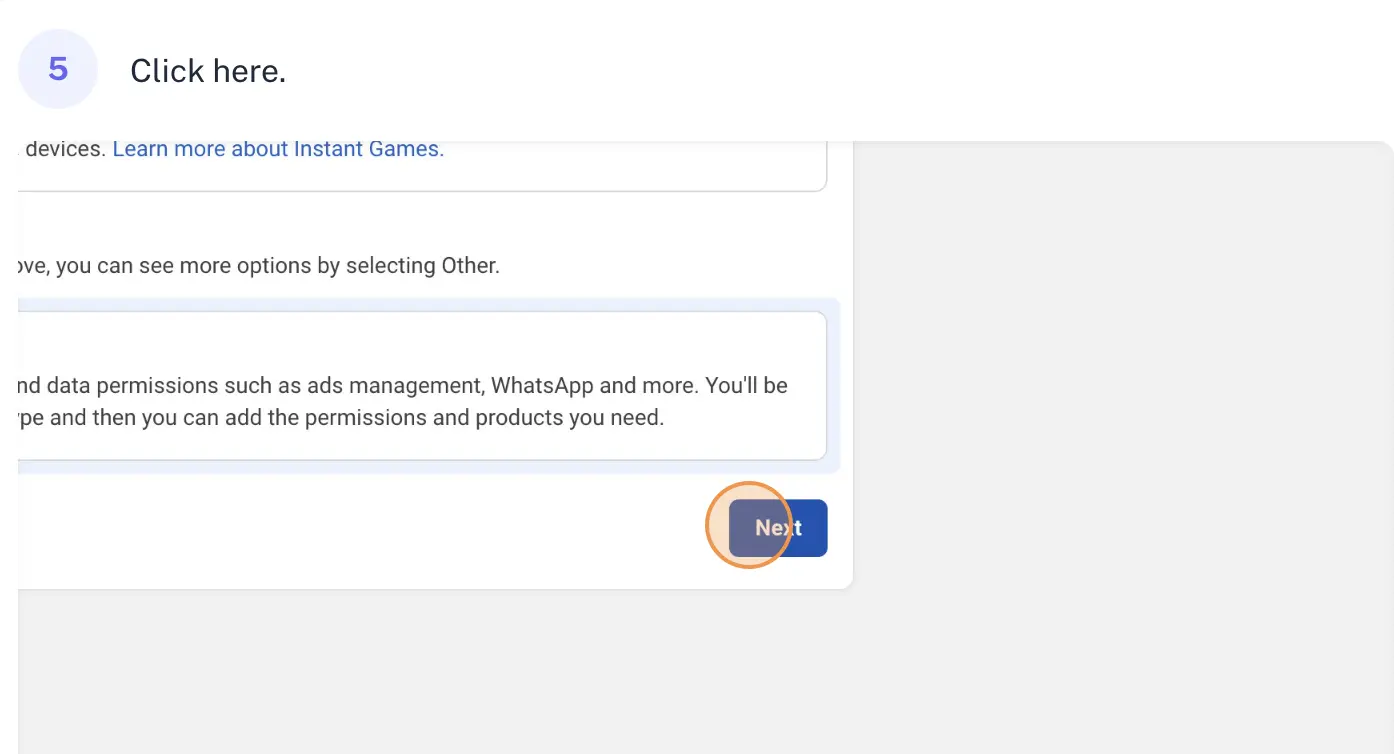
- Click on Other radio button.

- Click Next
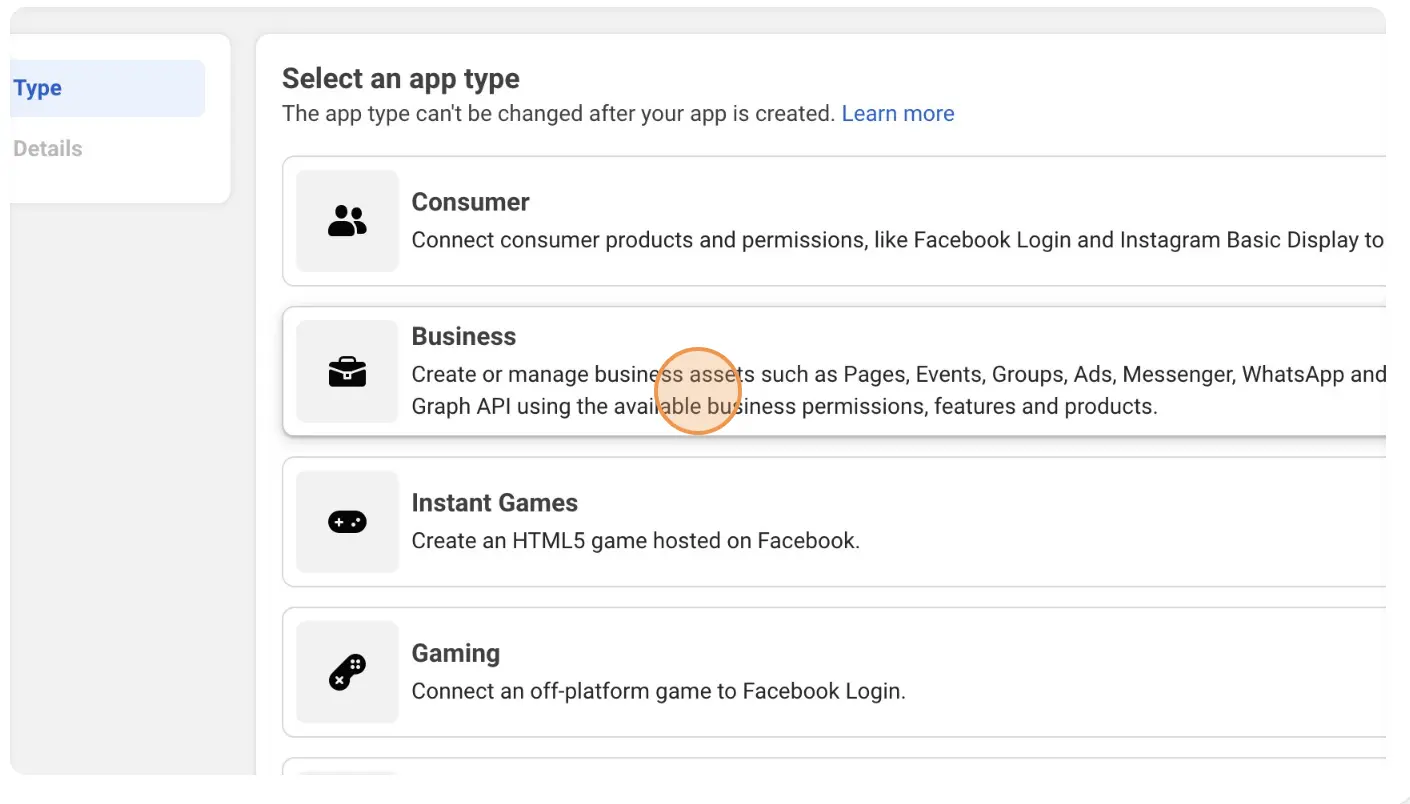
- Select Business app type
- Click “Next”
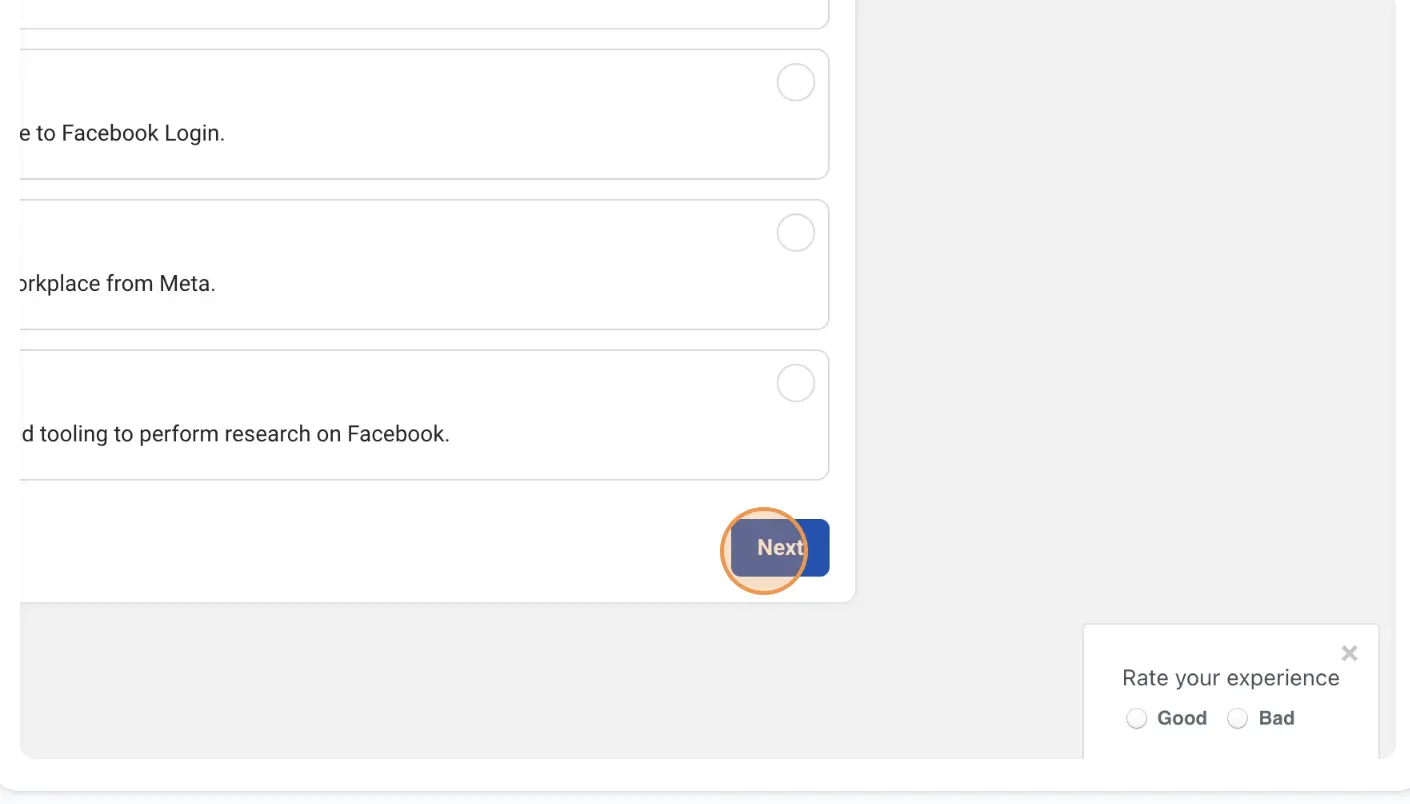
- Fill The form

- Click on “Create app”
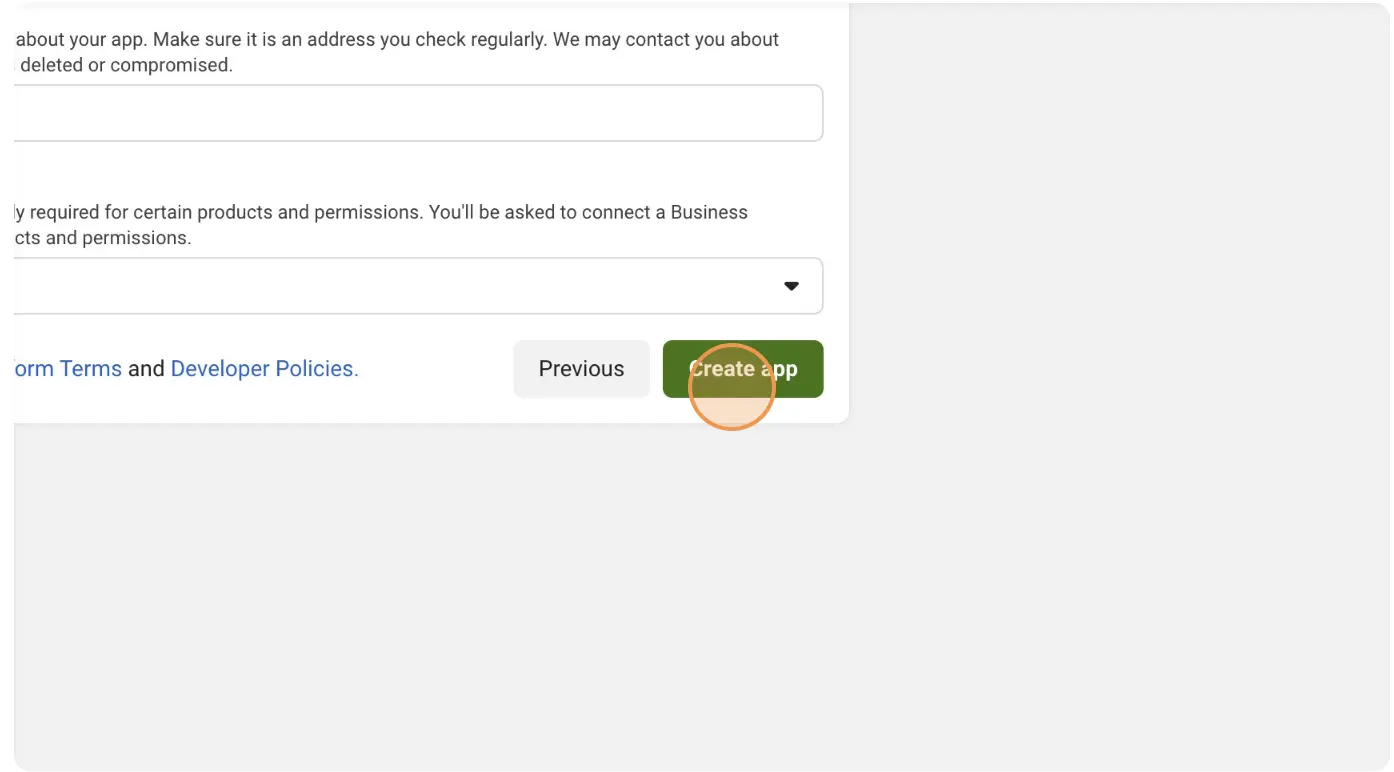
- You may ask to Login Again
- After creation of Business app, go to https://developers.facebook.com/apps/creation/ and create a new app, which we will use to access thread apis.
- Dusring the creation you will be ask to select a use case, please select Access the Thread API.
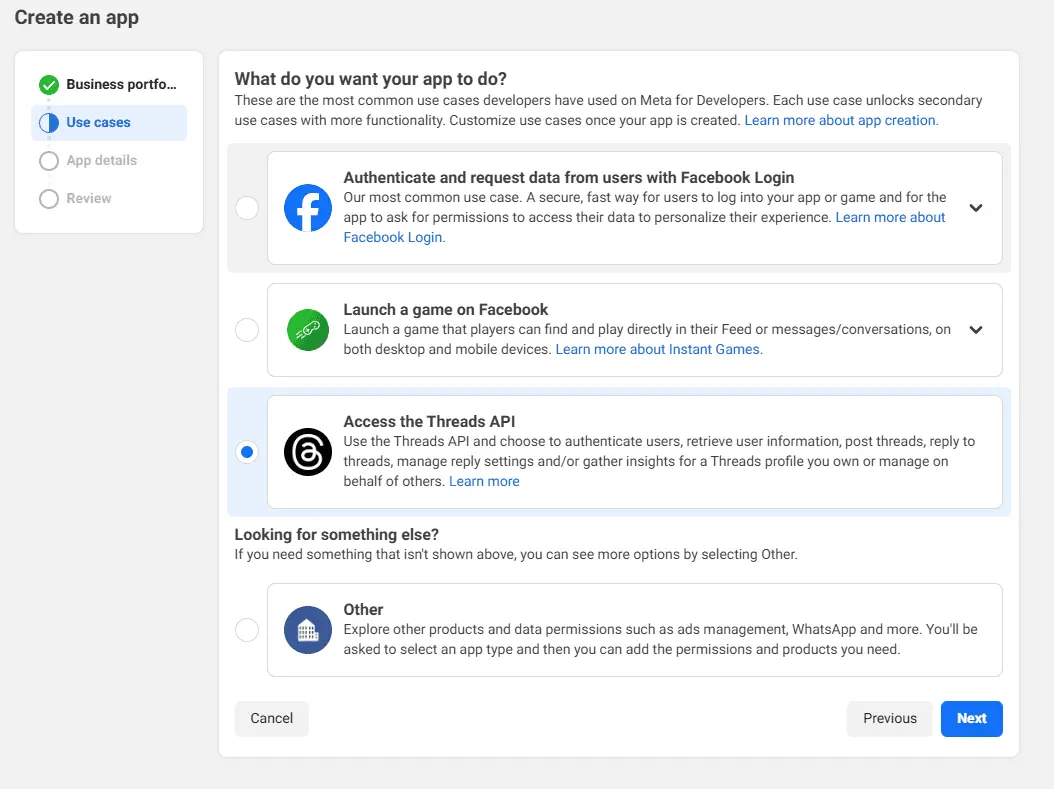
- Fill all the form correctly and submit.
- Navigate to the “My Apps” dashboard within your developer account.
Setting Permissions
Next, set the nec^essary permissions for your app. If you only intend to post content, the
threads_basicandthreads_content_publishpermissions should suffice. Additional permissions can be added later if needed.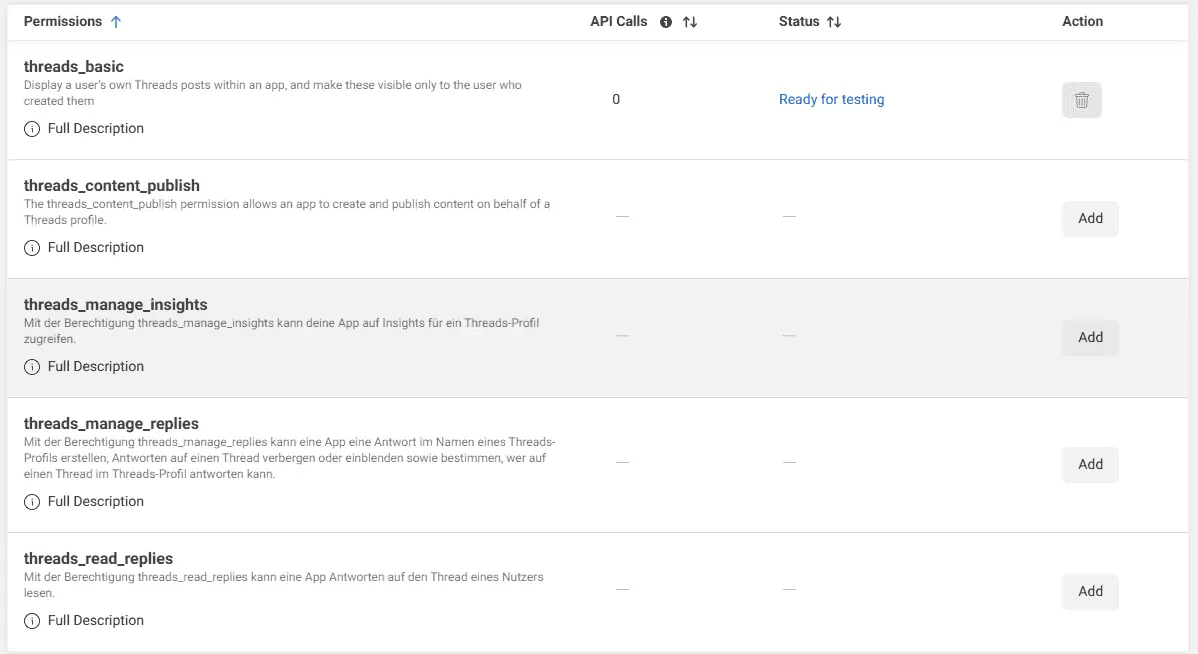
Configuring OAuth
OAuth is a passwordless authorization process that allows users to access resources securely. You’ll need to configure OAuth URLs for your app. If you don’t have a website, you can use Postman to handle the OAuth flow.
Use the following URL for Postman’s Redirect Callback:
- https://oauth.pstmn.io/v1/callback (postman app)
- https://oauth.pstmn.io/v1/browser-callback (postman in browser).
Adding Testers
If you want to invite specific people to test your app, you can add them as testers. However, this step is optional since OAuth will handle the authorization.
If you are generating token for ferret, you have to add your thread account as tester.
To add test user, Expend App roles and click on Roles. Click on Add People and select Thread Tester. please note when you add a user as tester, it sends a invite, you have to accept that invite.
App Settings
To make API calls to the Threads API, you’ll need the CLIENT_ID and CLIENT_SECRET. Be cautious with your client secret to prevent unauthorized access.
App Settings: Find these values under App settings and then Basic.
Authorization
Now that everything is set up, you can request an authorization code by navigating to the following URL in your browser:
https://threads.net/oauth/authorize?client_id=[CLIENT_ID]&redirect_uri=[REDIRECT_URL]&scope=[SCOPES]&response_type=code
SCOPES should be threads_basic,threads_content_publish
You’ll receive an authorization code at the redirect URL, which you can then use to request an access token.
Generate an Short Lived API Access Token
To convert the authorization code into an Short Lived access token, send a POST request:
- Url : https://graph.threads.net/oauth/access_token
- Method: POST
- Headers:
- Content-Type: ‘application/x-www-form-urlencoded’
- Parameters:
- client_id:[CLIENT_ID]
- client_secret:[Client_SECRET]
- grant_type:authorization_code
- redirect_uri:https://oauth.pstmn.io/v1/browser-callback
- code: [CODE_FROM_LAST_STEP]
Response
1
2
3
4
{
  "access_token": "",
  "user_id": "abc"
}
Generating a Long-lived Access Token
Since short-lived tokens expire quickly, convert it to a long-lived access token:
Generate Token
- Url: https://graph.threads.net/access_token?grant_type=th_exchange_token&client_secret=[CLIENT_ID]&access_token=[ACCESST_TOKEN_FROM_LAST_STEP]
Method: GET
Response
1
2
3
4
{
  "access_token": "",
  "id": ""
}
You’ll receive a long-lived access token, which you can use for extended access.
Securely Store Your Access Token
Treat your access token like a sensitive piece of information and store it securely. Avoid hardcoding tokens in your application code or sharing them indiscriminately.
Wrapping Up
Obtaining your API access token for post creation marks the initial step towards optimizing your Thread Page’s performance through automation. In Part 2 of this series, we’ll delve into leveraging your access token to programmatically create and schedule posts, empowering you to elevate your social media strategy.
Part 2 is out now.
